Apigee has provided a great set of documentation on how their Edge Gateway can be configured. This documentation does not replace it, but instead will help guide the process and outline some standardizations and guidelines.
Guidelines and Standards
- Example: https://api.ucsb.edu/students/lookups
- Use Standardized Shared Flows whenever possible * UCSB Standard API Key Shared Flow
- UCSB Standard Response Headers
- UCSB Standard Invalid Flow Response
- UCSB Standard PostClient
Steps to Create/Edit
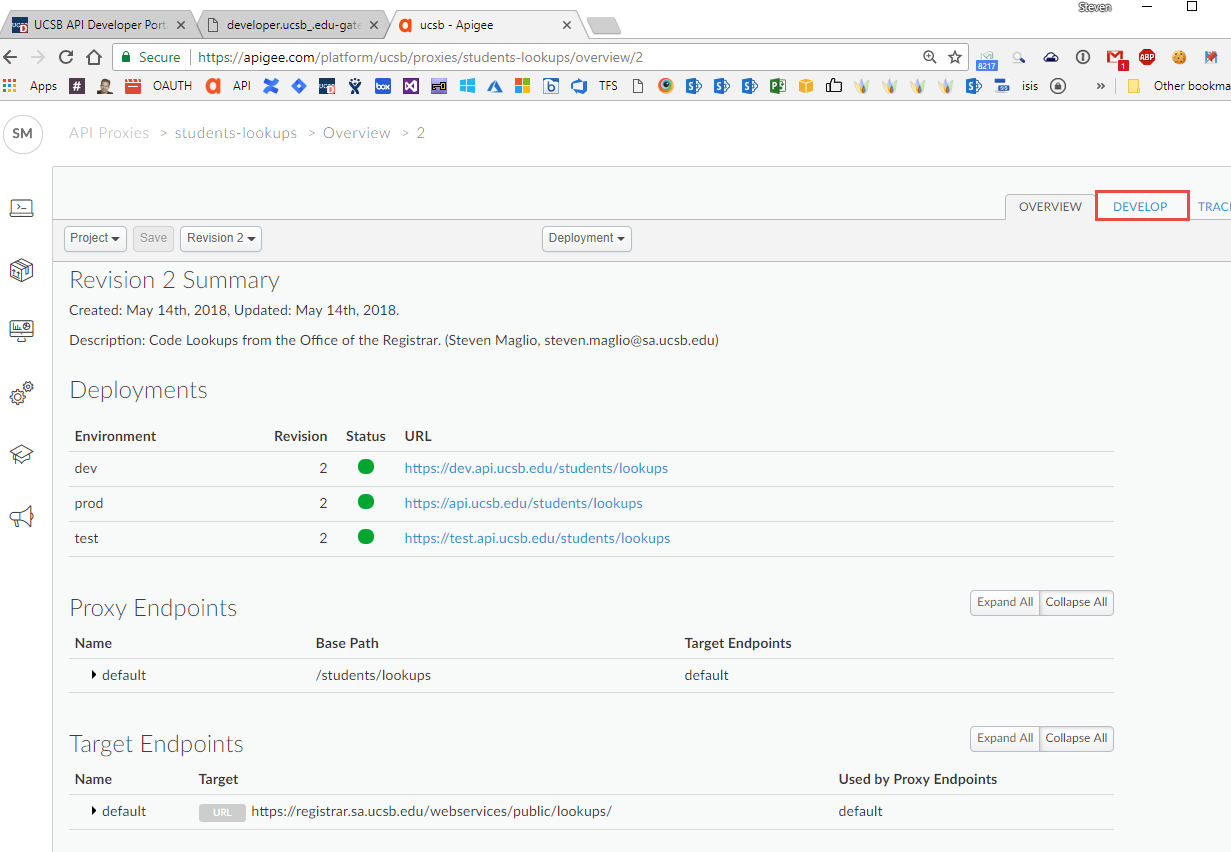
- The Overview tab is the best way to see at a glance what endpoints and environments an API Proxy is deployed to. But, switch over to the Develop tab.
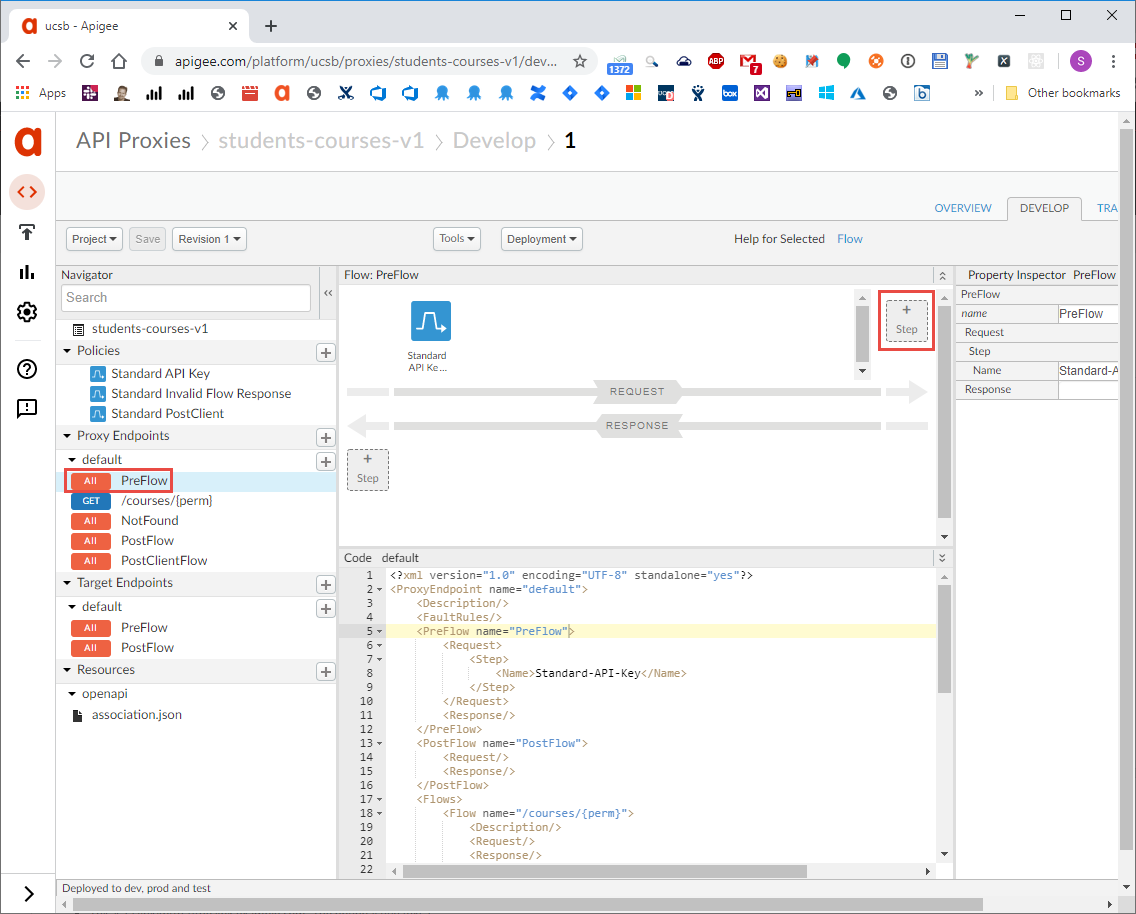
- We're going to add a number of Standard Shared Flows. (The next image and description describe how to add a shared flow.)
- Then, add the Standard API Key shared flow to the Request flow. This adds Authentication and Authorization.
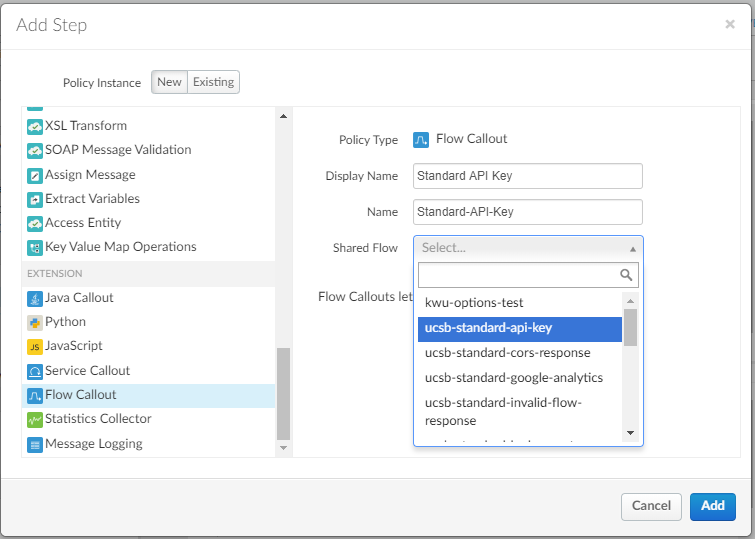
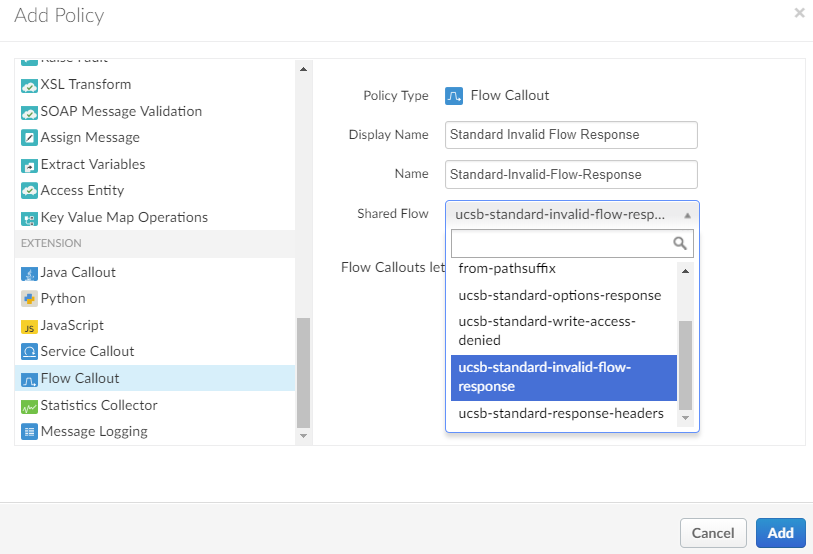
- To add a shared flow, in the Add Step overlay, scroll down and select Flow Callout.
- From the Shared Flow dropdown select ucsb-standard-xxx (in our example: ucsb-statndard-options-response).
- Update the Display Name to "Standard API Key". This should automatically update the Name.
- Then click Add.
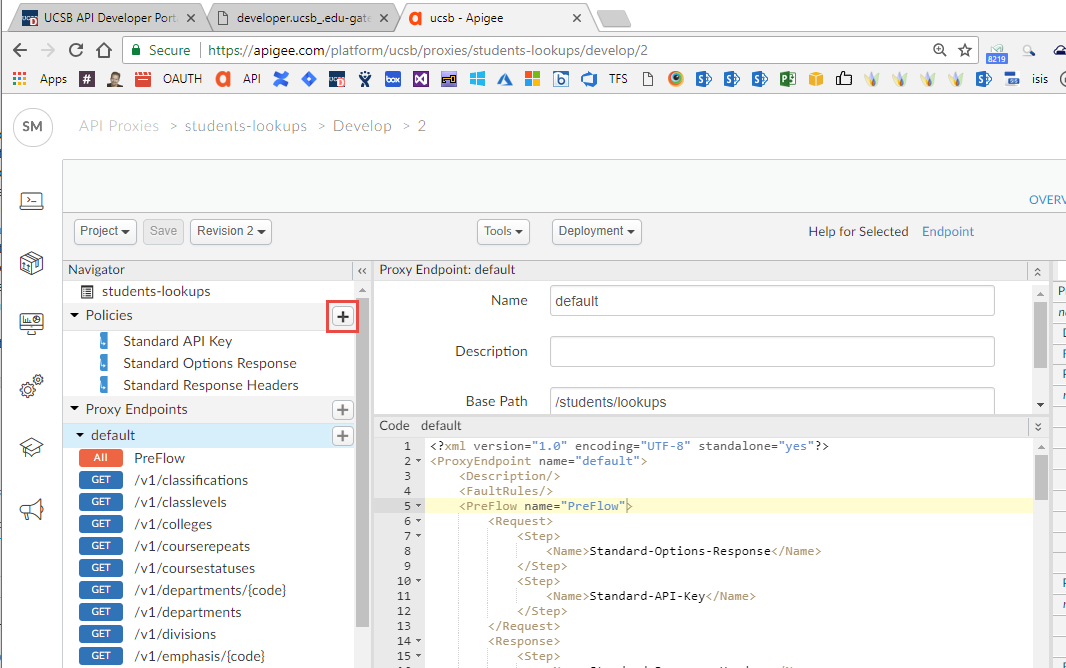
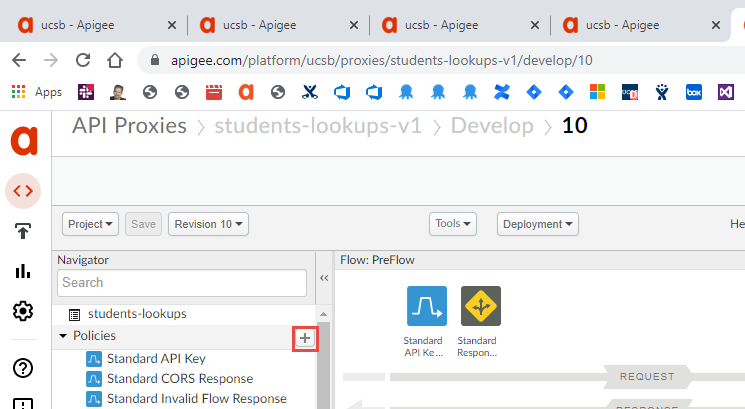
- Next, we'll add the Standard Invalid Flow Response. This one will need to be added using the + icon at the top of the Policies section.
- Then select the Flow Callout and the Shared Flow ucsb-standard-invalid-flow-response.
- Set the Display Name to "Standard Invalid Flow Response".
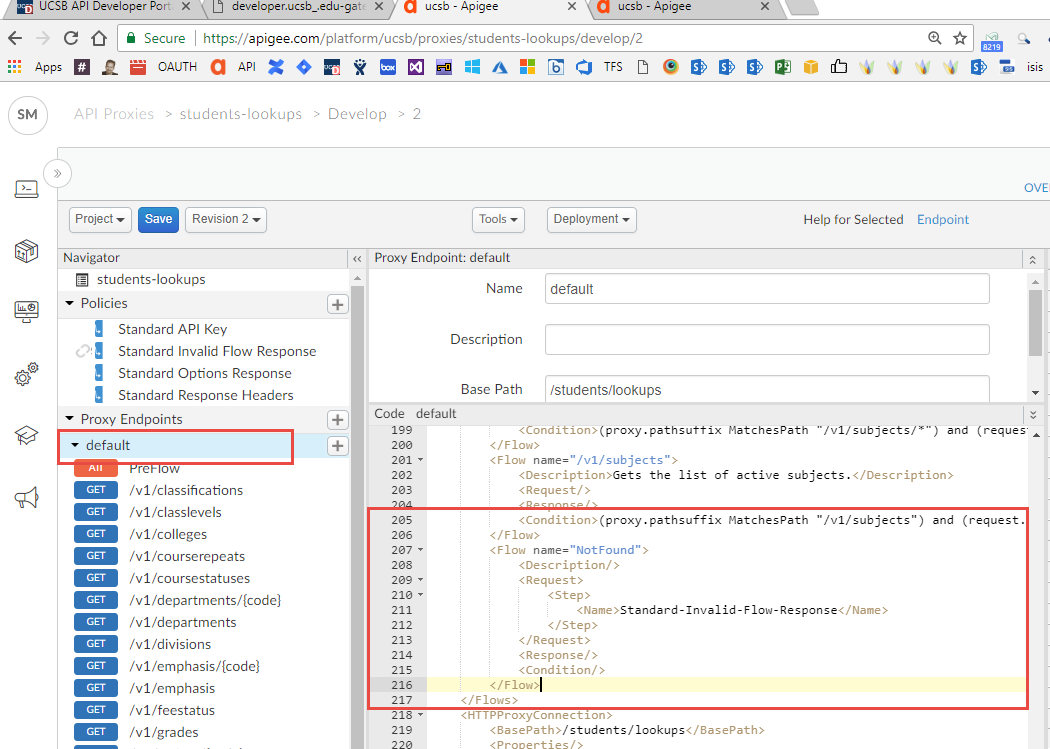
- Now that the policy is available, select default in the Proxy Endpoints section. This will change the middle section of the screen to show XML.
- Scroll down the XML to the last <Flow> in the <Flows> section.
- This adds a restriction on the endpoint. If the incoming request to the API Endpoint isn't a known path, then it's rejected. This is for a little extra security.
- Add a new <Flow> to the end of the list, using the code below:
<Flow name="NotFound">
    <Description/>
    <Request>
    <Step>
        <Name>Standard-Invalid-Flow-Response</Name>
    </Step>
    </Request>
    <Response/>
    <Condition/>
</Flow>
- Next, we'll add the Standard PostClient Flow. This one will log event information about the call to Splunk and Google Analytics. This one will need to be added using the + icon at the top of the Policies section.
- Then select the Flow Callout and the Shared Flow ucsb-standard-postclient.
- Set the Display Name to "Standard PostClient".

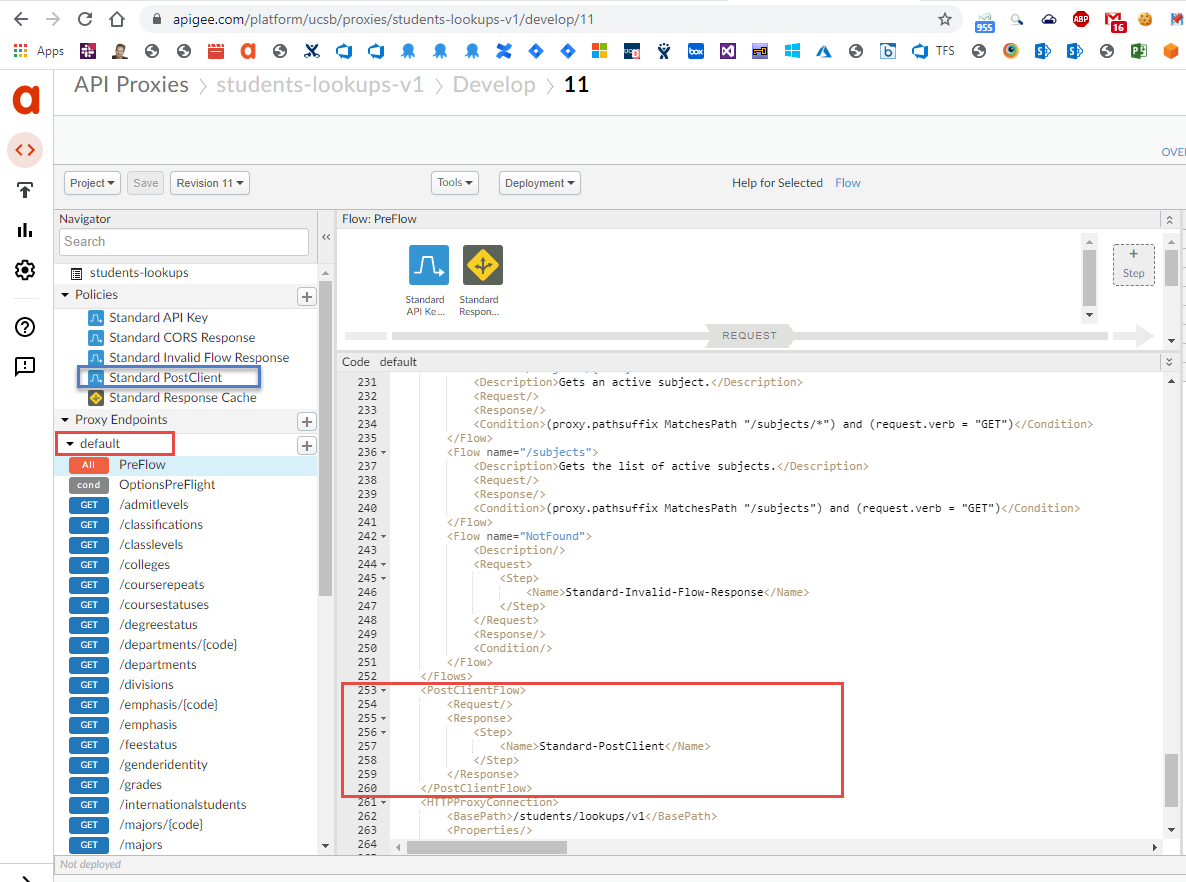
- Now that the policy is available, select default in the Proxy Endpoints section. This will change the middle section of the screen to show XML.
- Scroll down the XML to the closing </Flows> tag.
- We are going to add a new section, <PostClientFlow> between </Flows> and <HTTPProxyConnection>. Add this new section between them:
<PostClientFlow>
    <Request/>
    <Response>
        <Step>
            <Name>Standard-PostClient</Name>
        </Step>
    </Response>
</PostClientFlow>
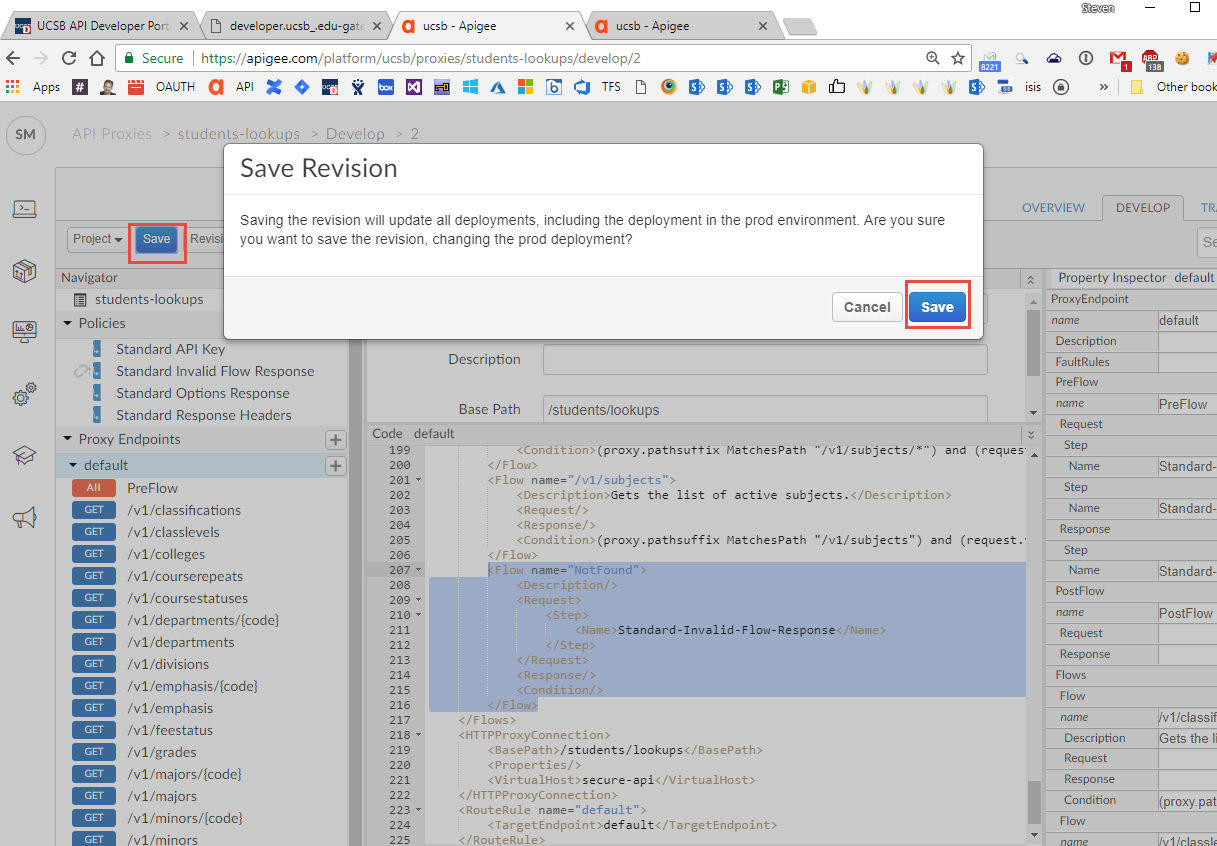
- Now we can Save the changes we made. Which may ask you if you want to update the current revision, click Save again.
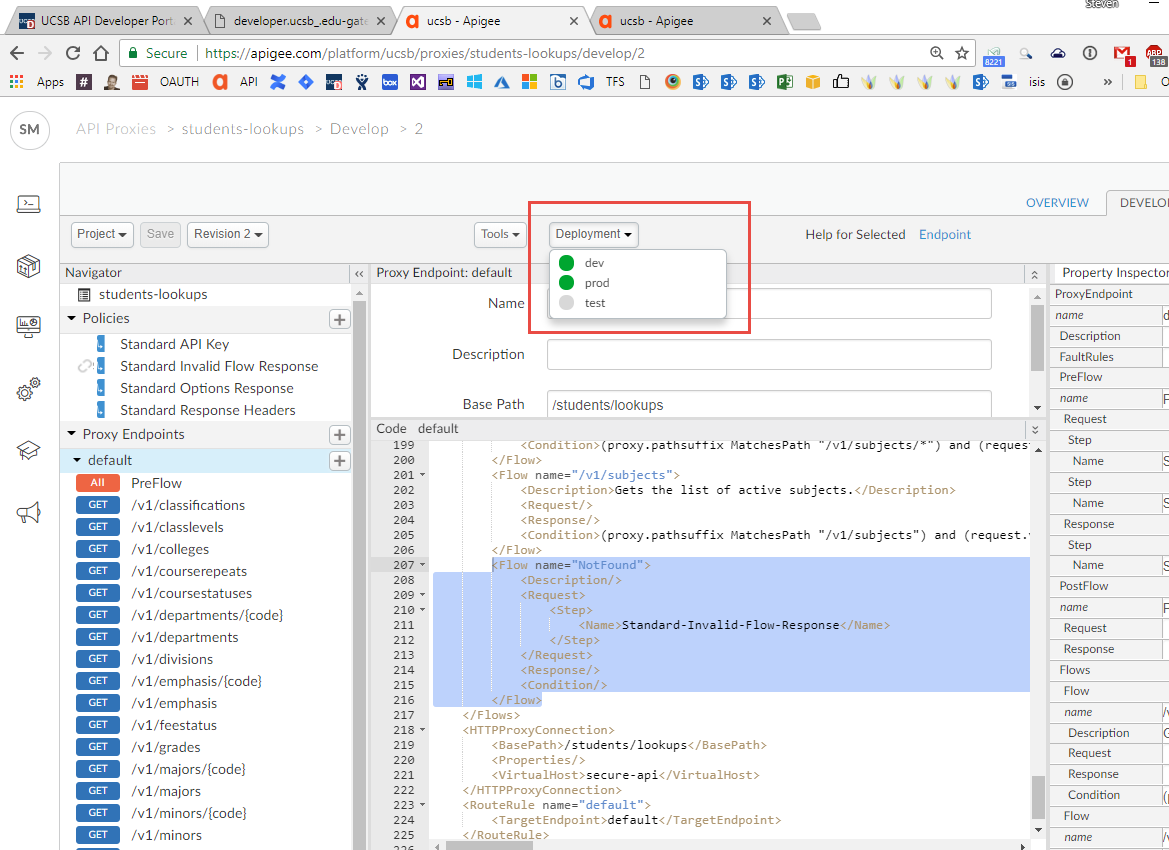
- Once saved, you can deploy the changes out to Test and Prod using the Deployment dropdown.
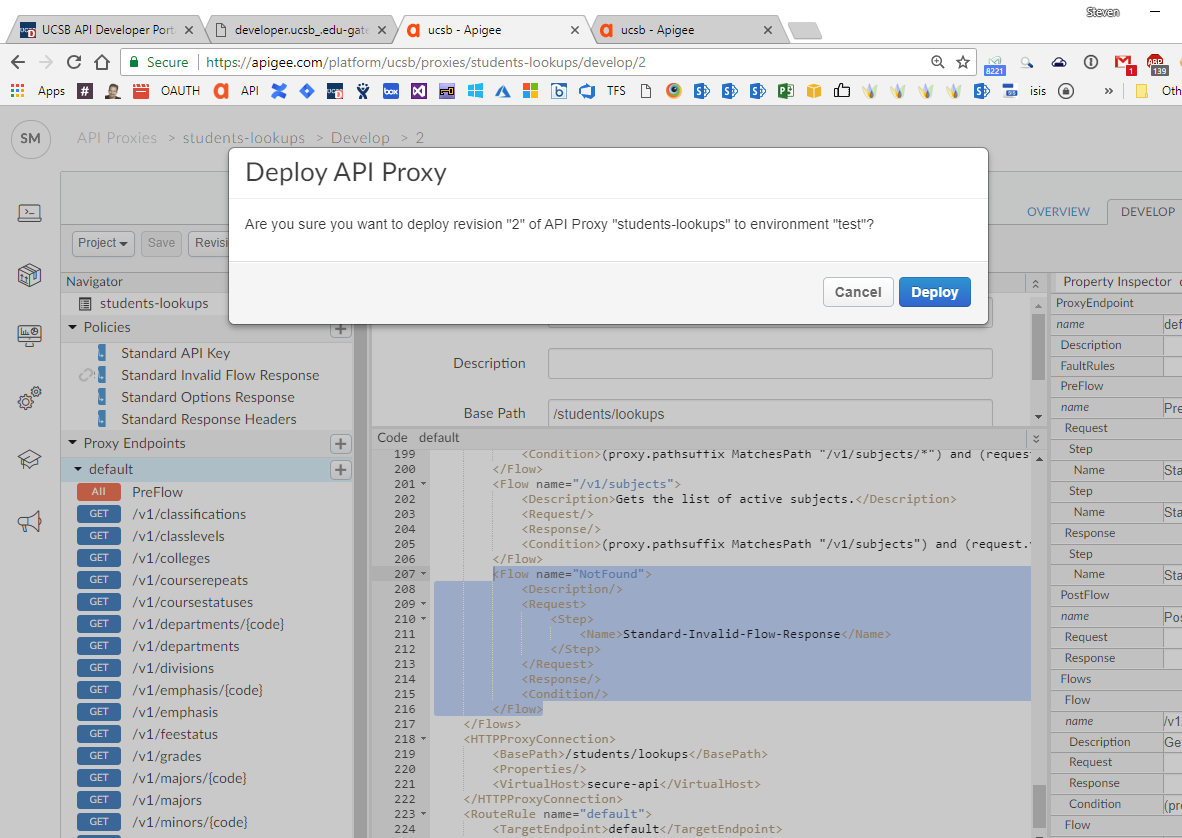
- You'll need to confirm the deployment by clicking Deploy.
Next let's Create an API Product